Wednesday, December 28, 2011

Elmo Quilt


I made 2 quilts for Christmas, one for each of my boys. It was my first quilting project. The only thing I am disappointed in is that I didn't flatten and smooth the fabric and batting enough when pinning. So there was a little bunching here and there. Nothing noticable to the average person, but frustrating for perfectionist me!
Euan loves 2 things right now. Cows and "Melmo"! I couldn't find any Elmo only fabric, and I really wanted a life size Elmo blanket. I drew a 3 foot sized Elmo on the red fabric with pencil, using googled images as my inspiration. I used a triple stitch setting (for boldness) and followed my pencil lines. This was Elmo's basic shape. Some lines went jagged, some went a stitch too far, but this totally worked for me. Elmo is fuzzy, so it looked perfect!
I cut out other colored fabric for the eyes, nose and mouth and did an applique technique. But after being washed, Elmo's eyes bled through a little and are now a faded red. Maybe for future projects, double up on the white and prewash the red fabric.
I am so proud of my quilt, even with the mishaps. I was pleasantly surprised with how adorable Elmo turned out! It's better than I had planned!

Cars Quilt


A Christmas present for Ethan. My first attempt at making a quilt. I got the basic instructions here. However.... I did the traditional binding, tedious hand stitiching! I bought the fabric for the front, and used an unused Cars flat sheet for the backing. It wasn't complete by Christmas, just the binding left to complete. But I wrapped it up anyway and finsihed it the next day. Ethan loves it!

Friday, December 23, 2011

Cow Shirt

I decided that since I made a shirt for Ethan, I should make one for Euie too. The first thing he really connected with was cows. When the Chick-fil-A opened in town, we went to the grand opening and got a picture with the cow. Euan just feel in love with him! His first words were mama, dada and cow! I free handed a clip art cow and came up with a cute little saying with his name. I used the freezer and fabric paint technique (instructions on dino shirt post here).

Friday, December 16, 2011

Mondu (Gyoza, Potstickers)


Whether it's a Korean dumpling, Chinese, Japanese... it's all the same idea. I tried my best to steal this recipe from my mom. She makes so much good food (what mom doesn't?). But being Korean, she makes things by what looks and tastes right. I need measurements! So I watched her like an eagle, pen and paper in hand... here's what I got!
Ingredients
1/2 lb. ground pork (sub. for tofu if you want vegetarian)
1 egg
1 small onion, finely chopped
1 carrot, finely chopped
3 scallions, chopped
Canola oil (or veg or peanut)
salt and pepper for taste (optional)
1 pack of gyoza wraps
1. Put a layer of canola oil in a skillet and heat to med/low. Fill another pot with water and bring to slight boil. You will need 2 plates (or I use 2 lasagna pans). Line one with a couple paper towels (this one will catch the oil from the cooked mondu), and the other with dampened paper towels. Also have a couple kitchen towels handy. I know this seems like a lot of prep, but I've done this MANY times and learned a system that works for me.
2. Mix pork, egg, onions, carrots, scallions, and seasoning in a medium bowl. By hand is best!

3. Wet the edge of one wrap with water (this will make it stick together when you fold it). You can put a paper towel or wash cloth underneath the wrap if it sticks to your counter or cutting board. 

4. Spoon a small amount of filling into the wrap. It will be about a tablespoon full. Leave a half inch border for sealing the wrap. Fold the wrap in half, it will looks like a semi-circle. Be careful not stretch the wrap, the skin can tear if it's too full. Put 3 crimps along the edge to seal it shut. If filling oozes out the sides, it's too full! Place filled mondu aside, not touching each other or they will stick. You can place them on a towel on the counter if they stick.


5. Drop about 7 or 8 mondu into the slightly boiling water. Let cook for 5 minutes. Fish out with a slotted spoon or strainer basket and place single layered on dampened paper towels. If the towels are dry, the skins will stick and tear. Trust me! The filling should be cooked through and safe to eat now.

6. Drop by hand a single layer of mondu into the skillet with oil. Fry for just a couple minutes on each side until lightly browned and crunchy.
*If you want, you can skip the boiling water and just fry the mondu. Make sure you cook long enough to cook the inside of the mondu. This will make for a VERY crunchy mondu!

Dip: mix 2 tablespoons of soy sauce, 1/2 tablespoon of sesame oil, a few shakes of tabasco and a tiny pinch of red pepper flakes. You can throw in a few chopped scallions too. Makes about 30-40 mondu.

Wednesday, December 7, 2011

What will it bee?


My sister-in-law had a "gender reveal" party... something I had never heard of. What a cool idea! Even before she knew what she was having, she picked a bee theme. Good for a boy or a girl. I think diaper cakes are just the cutest things ever! So I wanted to surprised her with a themed cake.
I got the a pizza pan for the tray (Dollar Store), a tall bottle for the frame of the cake (Pelligrino mineral water, WalMart, I think $1.50), ribbon and accents, rubberbands, one pack of newborn diapers. Generic diapers have more in the pack and fills out the cake better. I bought Pampers this time and had some empty spots, but was able to make it look presentable. Roll up the diapers in a rubberband, position a couple rows for the base, wrap with ribbon. Repeat that process for the next 2 teirs. I bought bee fabric, cut out the little bees and adhered them to the cake as an accent. I free-handed the bee on top out of cardstock, using the bee fabric as a guide.
I lucked out when I got to my SIL's house and she had everything set up, but not a big centerpiece. Yay for my cake! The decorations were adorable, it fit in just perfectly!

Monday, December 5, 2011

Dinosaur Shirt


I saw a personalized dinosaur shirt in a catalog and thought it was the cutest thing! But $40 for a tiny shirt?! Get outta here! So I was browsing the shirt-making aisle and my son found these iron-on dinosaur patches (he has recently gotten into dinosaurs). And then it clicked! I was already planning on making some grandparents shirts, why couldn't I make a little dinosaur shirt. Well, the disappointment came... I didn't have enough letters after my grandparents shirts to make my dinosaur shirt. Drat! But I had learned this freezer paper and painting technique.
Type out what you want on the shirt. I used my sons name and the year he was born. I think discovered is dinosaur-y.
Place freezer paper over the print out, and trace the outlines of the letters.
Cut out the letters with a razor. The letters can be disarded, that's where you'll be painting. But the little spaces inside the letters (Like in the A's, R's, O's, etc), keep those so you can iron them onto the shirt along with the cut out.
Place the now stenciled paper onto the shirt. I placed the dino patch on too, just to visualize. But I ironed that on after I painted. Iron the paper down, paying special attention to the edges. You want the edges down so the paint won't seep under the paper. Press the fabric paint onto the letters. Do 2 coats. I was a little anxious to get this project done. Maybe the paint wasn't dry enough, so I ended up with some not-so-crisp edges. But it worked for me. It's a dinosaur shirt!

DIY Grandparents Shirts

I really wanted to get my parents shirts with their grandkids on them; be it name or picture. I went to a website that had personalization options to add grandkids' names and/or picture. But not only did it end up being a lot of work to get the right picture (you had to have the perfect shot of just their face... and many of my shots are at home, with toys and other kids in the backround), but it was $20 per shirt PLUS shipping. I think the only color was white and I didn't care too much for the designs (options were limited!).

I decided to buy plain shirts ($3.99 a piece) and iron-on letters ($1.99 per sheet). I copied the cute phrase from the previous website "2 Reasons I Love Being a Grandpa" but couldn't find any cute little boy iron-on pictures. I remembered a website I came across recently for skeleton Halloween costumes, found here. I then decided to attempt to create my own little boy stick figures and put them on the shirt. My creation follows....
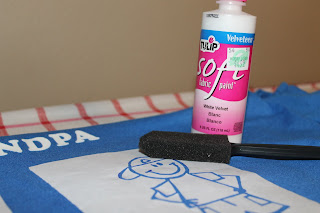
I got shirts and iron-on lettersfrom the craft store. We have Hobby Lobby, but sometimes I really miss having a Michaels's! And if you really want to cut down on costs, you can use 40% off coupons to make this project even cheaper.
Arrange the letters on the shirts. I use a ruler as a guide to make sure the letters were centers and lines were equally spaced.
Once you have a row of letters right where you want them, press with a hot, dry iron (specific heat temp should be listed on the letters package, it's seems to always be high though).
Now it's time for the pictures. Since I couldn't find what I had in mind, I opted to design them myself. Freezer paper is drawable on the paper side, and irons on the shiny side. Found with saran wrap OR in sporting. I thought that was weird, but hunters use it for freezing meat I guess. Makes sense... I googled boy stick figure images and free-handed with a sharpie. Use something that leaves a thick line so when you cut the image out, there will be enough space for the paint to make a definite line. Wherever I made a blue line, I will cut out and will paint. Does that make sense?
OK I didn't realize how overly ambitious my cute little stick figure boys were. With the pockets, fingers, extra details of lines here and there, ugh. But still very do-able. Keep all those pieces that get cut out, you'll need them to re-create your image.
Iron the outline image on first. Position exactly where you want it and press with a hot, dry iron. Make sure the edges are pressed down. You want nice, crisp paint lines. Now place those cut out pieces back into the picture; shorts, shirt, hat, face, etc. Whatever you cut out that will re-create what you first drew. I did them one at a time to make sure they were properly placed.
Now it's time to paint. I got textured fabric paint, I didn't know what "textured" meant, but it was the only kind. The skeleton costume website says to use a brush with stiff bristles, so that can be used too. I didn't have one and I didn't want to pay $4 for a whole pack. I had a pack of foam brushed from the dollar store from when we painted our house, and that seemed to work out just fine.
Slide some cardboard under your images, the paint will soak through a bit. Press the paint down, don't do strokes. You don't want any paint to seep under the paper. Do 2 coats. Peel the paper off. You can use your razor to help lift up the edges of the paper. Turn it inside out and slide it oover the ironing board (just the front of the shirt that has the images should be on the board). Quickly press the painted images. The paint may seep through a bit more. This helps seal the paint and puffs the paint up. Ah ha! *lightbulb* "Textured" paint! Now I get it! I love the effect this gives the paint.
I made one for Grandma too. There were some spots here and there that seeped under the paper, or paint peeled up with the paper. I just touched up as needed and it looks great! Exactly what I envisioned! Aside from the paint, which I will use in many more future projects, this project costed me about $8 per shirt. If I would have used my 40% off coupons, I would have saved more money! Or you can print these out off of the computer, trace onto freezer paper, and cut the letters out. My kids' names required lots of E's, A's and N's, so you may need more or less sheets of letters depending on your names. But there you have it, 2 personalized, handmade Christmas gifts.

Thursday, September 29, 2011

Crochet Caterpillar

 
My son fell in love with one of my favorite books about a caterpillar. I love all the little stuffed toys that come with books, but not enough to buy them all! I was inspired while searching for a pattern (to no avail) and so, I improvised. . The pattern is available at my etsy store, http://www.etsy.com/shop/MyHandmadeWorkshop.

Saturday, August 6, 2011

Peter Rabbit


My first original pattern! I made one a couple of years ago to go with a Peter Rabbit book for my niece's first birthday. Son 1 recently found a Peter Rabbit book in our home library and that inspired me to make another Peter and finally publish my pattern. This is a free pattern, so please don't sell it and give credit where it is due.
Materials needed
Double pointed needles - size 3 (3.25 mm)
Tapestry needle
PolyFil
Stitch marker
Safety eyes (optional)
Yarn
Worsted - I used cotton yarn for the body and cotten-ease for the jacket, 'cause that's what I had!
Note - You'll make him in pieces, stuff, and then assemble. Most of the pattern is knit in the round. Lots of cute, little pieces!
Head (body parts are made with light brown yarn)
CO 6, knit a row as for an i-cord, divide evenly on 3 needles
1. kfb all sts (12 sts)
2. knit
3. *kfb, k1*; repeat from * (18 sts)
4. knit
5. *kfb, k2*; repeat from * (24 sts)
6. knit
7. *kfb, k3*; repeat from * (30 sts)
8-12. knit
13. *k2tog, k3*; repeat from * (24 sts)
14. knit
15. *k2tog*, k2*; repeat from * (18 sts)
16. knit
Place and secure safety eyes (or place buttons for eyes or embroider). Embroider nose, I used black yarn which will also be used for Peter's shoes. Stuff head.
17. *k2tog, k1*; repeat from * (12 sts)
18. knit
19. k2tog all sts (6 sts)
Cut yarn leaving about 6 inches for attaching to the body, pull tight to close the head. Weave in other yarn end.
Body
CO6, knit a row as for an i-cord, divide evenly on 3 needles
1. kfb all sts (12 sts)
2. knit
3. *kfb, k1*; repeat from * (18 sts)
4. knit
5. *kfb, k2*, repeat from * (24 sts)
6. knit
7. *kfb, k3*, repeat from * (30 sts)
8-12. knit
13. *k2tog, k3*, repeat from * (24 sts)
14-16. knit
17. *k2tog, k2*, repeat from * (18 sts)
18-20. knit
Stuff body
21. *k2tog, k1*, repeat from * (12 sts)
22. knit
23. BO, draw yarn through cast off sts, pull tightly to secure, weave in yarn ends.
Arms (make 2)
CO6, knit a row as for an i-cord, divide evenly on 3 needles
Knit 7 rows
Cut yarn leaving about 6 inches for attaching to the body. Stuff lightly. Draw yarn through sts and pull tight to close arm. Weave in other yarn end.
Ears (make 2)
This will be worked on 2 needles, not in the round, but back and forth as for straight needles
CO6 with a long tail (about 6 inches) for attaching to the head.
1. knit
2. purl
3. knit
4. purl
5. knit
6. purl
7. k2tog, k4, k2tog (4 sts)
8. purl
9. k2tog all sts (2 sts)
Cut yarn and draw through sts. Pull up and this will make the ears pointed. Weave in.
Shoes (black yarn, make 2)
CO9, knit as for an i-cord, divide evenly on 3 needles
1-8. knit
Cut yarn leaving about 6 inches for attaching to body. Stuff. Draw yarn through sts and pull tight to close shoe. Weave in other yarn end,
Tail (white yarn)
CO6, knit as for an i-cord, divide evenly on 3 needles
1. kfb all sts (12 sts)
2-4. knit
5. k2tog all sts (6 sts)
Stuff. Cut yarn leaving about 6 inches for attaching to body. Draw through sts and pull tight to close tail.
Jacket (blue yarn)
This is worked back and forth as for straight needles.
CO28
1-2. knit
3. purl
4. knit
5. purl
6. knit
7. purl
8. k6, BO3, k until 5 sts remain, BO3, k to end
9. p to BO sts, CO3, p until BO sts, CO3, p to end (this creates a hole for the arms)
10. k2tog, repeat once, knit until 4 sts remain, k2tog all sts
11. purl
12. BO knitwise
Cut yarn and weave in all ends
Sleeves (make 2)
CO10, divide sts 4-3-3 on 3 needles
1-8. knit
9. BO
Cut yarn leaving about 6 inches for attaching to the jacket. Weave in other yarn end.
Assembly
Attach the head to the body, the BO end of the body acts as the neck of Peter, so he kind of has a pear shape body. Position ears on top of the head slightly spaced and attach. Use the jacket as a guide to where the arms should be placed, about shoulder height and on each side of the body. Attached shoes about shoulder length apart of the bottom of the body. Attach tail to Peter's bottom. Attach sleeves to jacket. Weave in all ends and cut excess yarn.
Put the jacket on Peter. This may be a snug fit depending on how tight the sleeves were attached and how much the arms were stuffed. You can also attach some little "brass" buttons to his jacket.

Friday, July 22, 2011

Homemade Bread

I have a copy of this recipe out of a book. I got it from a friend, so I don't know the name of the cookbook. I thought it was a Willams-Sonoma book, but the bottom says The Amish Cook...so your guess is as good as mine I guess! I LOVE this bread. It usually only lasts one day!
Ingredients
1 (1/4 ounce) package active dry yeast (or 2 1/4 teaspoons)
1/2 cup plus 2 cups warm water or milk
1 heaping tablespoon lard or shortening
2 tablespoons sugar
1 tablespoon salt
7-8 cups all-purpose flour
1. In a small bowl, dissolve the yeast in 1/2 cup warm water. In a large bowl (or your stand mixer) combine lard, sugar salt, and the remaining 2 cups of water.
2. Stir in the dissolved yeast and enough flour to make a soft, elastic dough that doesn't stick to the sides of the bowl. Cover with a loose piece of cheesecloth or plastic wrap and let rise till double (about 1 1/4 hours) in a warm, draft free place.
3. Punch the dough down, and divide it into 2 balls. Form 2 loaves in greased loaf pans. Cover with a damp cloth and let rise again until double (45-60 minutes).
4. Bake in a 325 degree oven for about 45 minutes. The bread will sound hollow when it's done. After removing the bread from the oven, brush the top with butter. This will make for a softer crust.